springboot-vue-后台管理系统-前端部分-p1-基础语法-代码编写量-练手
上一级页面:springboot-vue-后台管理系统-前端部分
本系列关注前端部分,根据学习路线图达到学习Vue.js的目的
developer路线图developer-roadmap/translations/chinese at master · kamranahmedse/developer-roadmap
前言
在本节我们复习了大部分vue的基础语法,有了一定的代码编写量,最终以一个封装好的Vue分页组件作为结尾。
用到的技术栈
初始化项目
官方文档:快速上手 | Vue.js (vuejs.org)
npm init vue@latest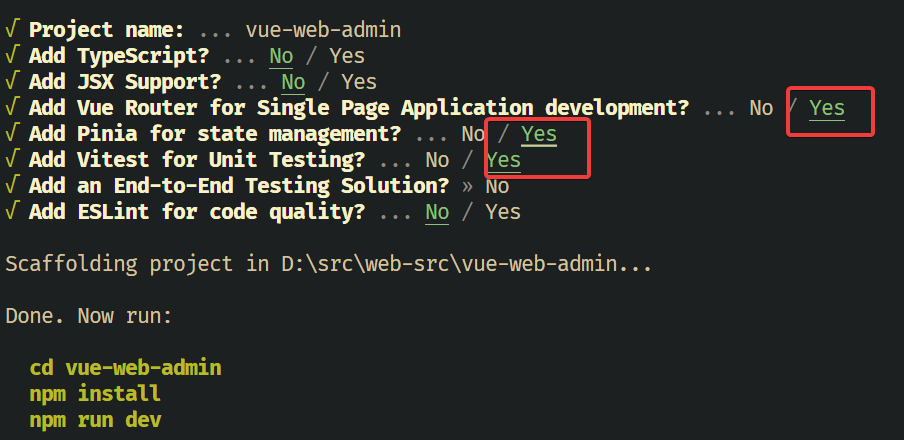
进入项目,安装依赖并且运行服务器
cd vue-web-admin
npm install
npm run dev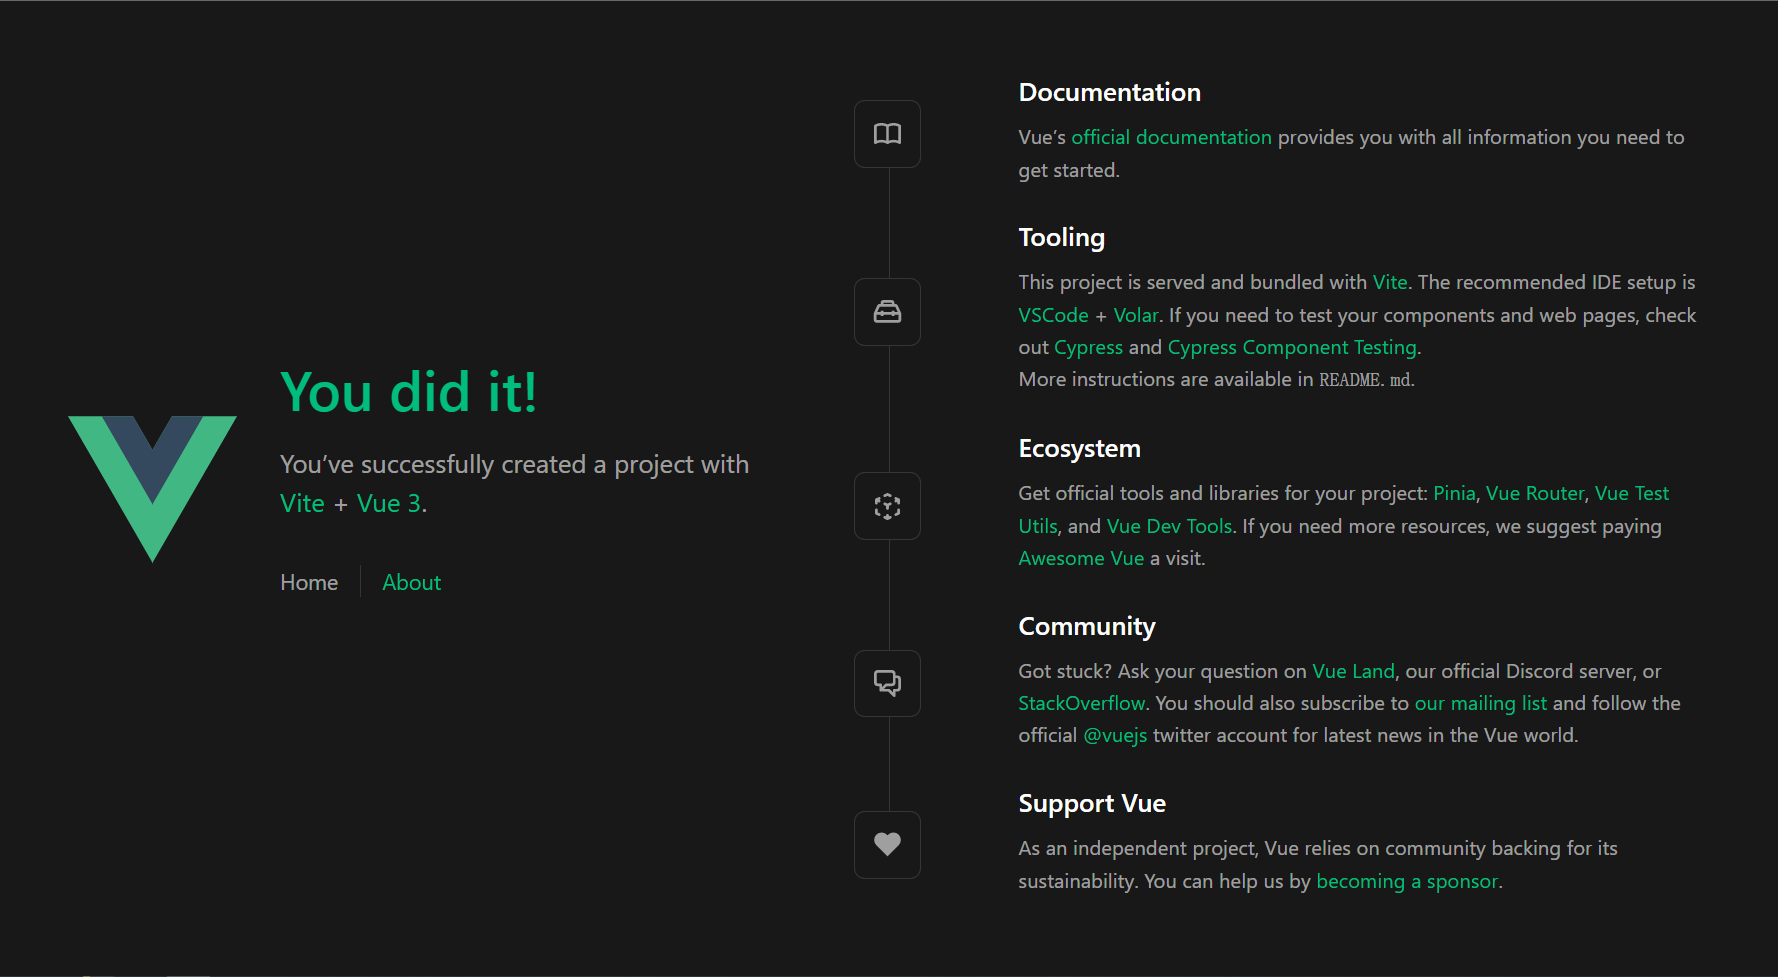
注意代码不要放到软链接或者中文的目录下,推荐像我这样放到
D:/src/web-src/vue-web-admin安装vue axios
axios是对AJAX的封装,本项目需要使用,npm包仓库:vue-axios - npm (npmjs.com)
安装命令
npm install --save axios vue-axios导入页面模板
导入尚硅谷提供的模板,复制admins文件夹到src/assets/template,新的路径是vue-web-admin\src\assets\admin
假数据测试
新建一个文件src/views/TestAxiosView.vue
<script>
export default {
  name: "Book",
  data() {
    return {
      msg: "hello vue!",
      //   制造一些假数据,前端来拿测试用
      books: [
        {
          id: 1,
          name: "1984",
          author: "乔治奥威尔",
          pubTime: "2001-01-05",
        },
        {
          id: 2,
          name: "计算机零基础实战",
          author: "张三",
          pubTime: "2022-04-25",
        },
      ],
    };
  },
};
</script>

<template>
  <div class="greetings">
    <table>
      <tr>
        <th>aaaa</th>
        <th>aaaa</th>
        <th>aaaa</th>
      </tr>
      <tr v-for="item in books" :key="item.id">
        <td>{{ item.id }}</td>
        <td>{{ item.name }}</td>
        <td>{{ item.author }}</td>
        <td>{{ item.pubTime }}</td>
      </tr>
    </table>
  </div>
</template>

<style scoped>
h1 {
  font-weight: 500;
  font-size: 2.6rem;
  top: -10px;
}

h3 {
  font-size: 1.2rem;
}

.greetings h1,
.greetings h3 {
  text-align: center;
}

@media (min-width: 1024px) {
  .greetings h1,
  .greetings h3 {
    text-align: left;
  }
}
</style>更改src/App.vue,添加一句<RouterLink to="/book">Book</RouterLink>
<script setup>
import { RouterLink, RouterView } from "vue-router";
import HelloWorld from "./components/HelloWorld.vue";
</script>

<template>
  <header>
    <img
      alt="Vue logo"
      class="logo"
      src="@/assets/logo.svg"
      width="125"
      height="125"
    />

    <div class="wrapper">
      <HelloWorld msg="You did it!" />

      <nav>
        <RouterLink to="/">Home</RouterLink>
        <RouterLink to="/about">About</RouterLink>
        <RouterLink to="/book">Book</RouterLink>
      </nav>
    </div>
  </header>

  <RouterView />
</template>

<style scoped>
header {
  line-height: 1.5;
  max-height: 100vh;
}

.logo {
  display: block;
  margin: 0 auto 2rem;
}

nav {
  width: 100%;
  font-size: 12px;
  text-align: center;
  margin-top: 2rem;
}

nav a.router-link-exact-active {
  color: var(--color-text);
}

nav a.router-link-exact-active:hover {
  background-color: transparent;
}

nav a {
  display: inline-block;
  padding: 0 1rem;
  border-left: 1px solid var(--color-border);
}

nav a:first-of-type {
  border: 0;
}

@media (min-width: 1024px) {
  header {
    display: flex;
    place-items: center;
    padding-right: calc(var(--section-gap) / 2);
  }

  .logo {
    margin: 0 2rem 0 0;
  }

  header .wrapper {
    display: flex;
    place-items: flex-start;
    flex-wrap: wrap;
  }

  nav {
    text-align: left;
    margin-left: -1rem;
    font-size: 1rem;

    padding: 1rem 0;
    margin-top: 1rem;
  }
}
</style>更改src/router/index.js,
import { createRouter, createWebHistory } from "vue-router";
import HomeView from "../views/HomeView.vue";
import AxiosView from "../views/TestAxiosView.vue";

const router = createRouter({
  history: createWebHistory(import.meta.env.BASE_URL),
  routes: [
    {
      path: "/",
      name: "home",
      component: HomeView,
    },
    {
      path: "/about",
      name: "about",
      // route level code-splitting
      // this generates a separate chunk (About.[hash].js) for this route
      // which is lazy-loaded when the route is visited.
      component: () => import("../views/AboutView.vue"),
    },
    {
      path: "/book",
      name: "book",
      component: AxiosView,
    },
  ],
});

export default router;主要步骤就两步,导入AxiosView
import AxiosView from "../views/TestAxiosView.vue";新增一个router项
    {
      path: "/book",
      name: "book",
      component: AxiosView,
    },
现在运行服务,即可看到效果
axios初步尝试
前端部分
按照官方示例来,vue-axios - npm (npmjs.com)
我用的是vue3的选项式api,下面给出导入axios的方法。对于组合式api,见vue-js-vue-axios-快速上手
首先导入到vue的全局/src/main.js中
import axios from "axios";
import vueAxios from "vue-axios";

const app = createApp(App);
app.use(vueAxios, axios);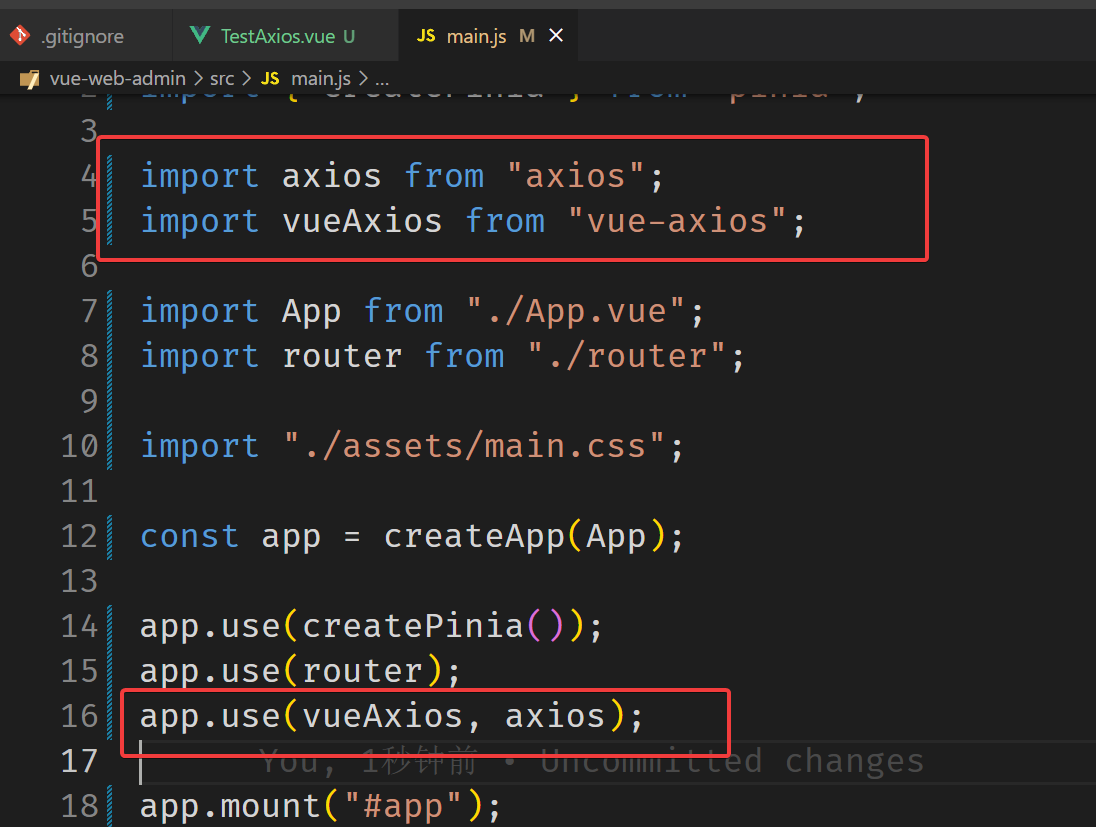
更改文件src/views/TestAxiosView.vue
<script>
export default {
  name: "Book",
  data() {
    return {
      msg: "hello vue!",
      //   制造一些假数据,前端来拿测试用
      books: [
        {
          id: 1,
          name: "1984",
          author: "乔治奥威尔",
          pubTime: "2001-01-05",
        },
        {
          id: 2,
          name: "计算机零基础实战",
          author: "张三",
          pubTime: "2022-04-25",
        },
      ],
    };
  },
  created() {
    const _this = this;
    const axios = this.axios;
    axios
      .get("http://localhost:8081/book/findAll/1")
      .then(function (response) {
        console.log(response.data);
        console.log(_this.books.name);
      })
      .catch(function (error) {
        console.log(error);
      });
  },
};
</script>

<template>
  <div class="greetings">
    <table>
      <tr>
        <th>aaaa</th>
        <th>aaaa</th>
        <th>aaaa</th>
      </tr>
      <tr v-for="item in books" :key="item.id">
        <td>{{ item.id }}</td>
        <td>{{ item.name }}</td>
        <td>{{ item.author }}</td>
        <td>{{ item.pubTime }}</td>
      </tr>
    </table>
  </div>
</template>

<style scoped>
h1 {
  font-weight: 500;
  font-size: 2.6rem;
  top: -10px;
}

h3 {
  font-size: 1.2rem;
}

.greetings h1,
.greetings h3 {
  text-align: center;
}

@media (min-width: 1024px) {
  .greetings h1,
  .greetings h3 {
    text-align: left;
  }
}
</style>新增了一个axios方法
  created() {
    const _this = this;
    const axios = this.axios;
    axios
      .get("http://localhost:8081/book/findAll/1")
      .then(function (response) {
        console.log(response.data);
        console.log(_this.books.name);
      })
      .catch(function (error) {
        console.log(error);
      });
},注意我这里写的url是http://localhost:8081/book/findAll/1
后端部分
后端设置一下端口为8081
# application.properties
server.port=8081
后端代码如下:
// AxiosController
package com.atguigu.admin.controller;

import org.springframework.web.bind.annotation.*;

import java.util.HashMap;
import java.util.Map;

@RestController
@RequestMapping("/book")
public class AxiosController {

    @ResponseBody
    @GetMapping("/findAll/{page}")
    public Map<String, Object> findAll(@PathVariable("page") String page) {
        Map<String, Object> map = new HashMap<>();
        map.put("page", page);

        return map;

    }
}
后端还要新增一个跨域配置类
// CrosConfig
package com.atguigu.admin.config;


import org.springframework.context.annotation.Bean;
import org.springframework.context.annotation.Configuration;
import org.springframework.web.servlet.config.annotation.CorsRegistry;
import org.springframework.web.servlet.config.annotation.WebMvcConfigurer;

@Configuration
public class CrosConfig {
    @Bean
    public WebMvcConfigurer corsConfigurer() {
        return new WebMvcConfigurer() {
            @Override
            public void addCorsMappings(CorsRegistry registry) {
                registry.addMapping("/**")
                        .allowCredentials(false)
                        .allowedMethods("POST", "GET", "PUT", "OPTIONS", "DELETE")
                        .allowedOriginPatterns("*");
                // 高版本的springboot,把.allowedOrigins("*")改成.allowedOriginPatterns("*")就可以,低版本的使用.allowedOrigins("*")
            }
        };
    }

}
运行效果
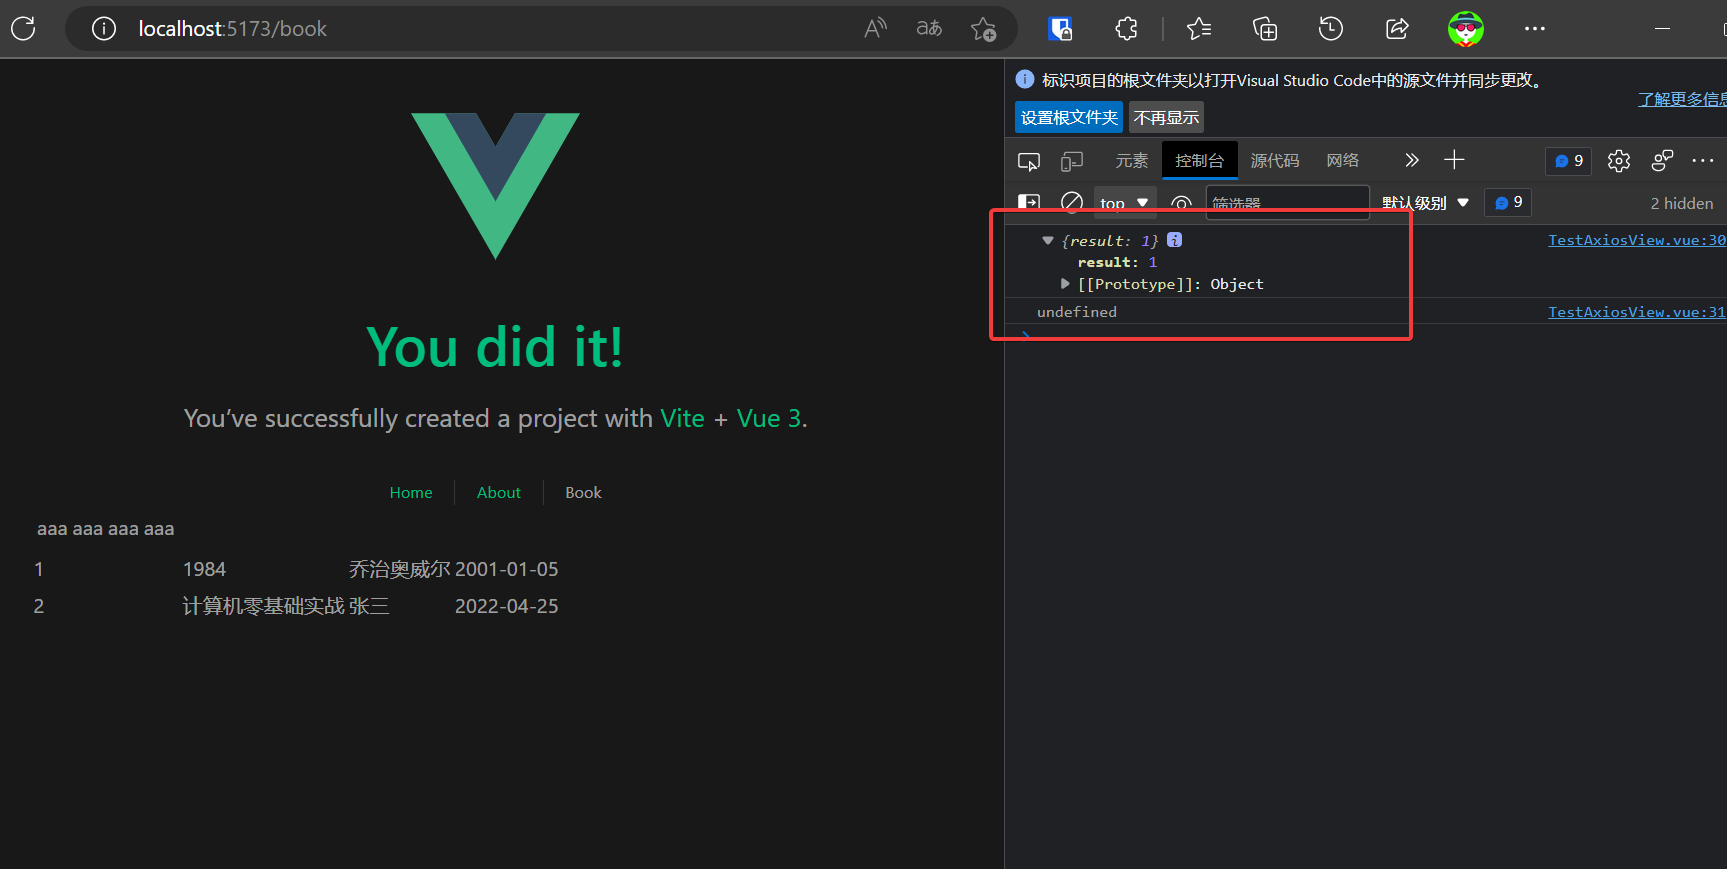
运行后端服务器,

刷新网页,打开控制台,可以看到结果
添加一个简单分页功能
思路是这样的。
前端向后端传page和row,分别是页数和每页数据数。
后端通过这两个参数来查询数据库,并向前端返回两个参数Total和DtoList
其中Total是数据库中的总数,dtoList是当前页面的数据数(dtoList通过前端传来的当前页数和每页显示数量,查询获得)
参数命名可能有区别,但是功能一般都是这样的。
首先安装lodash-es依赖,
npm i lodash-es --save- 官方文档:lodash-es - npm (npmjs.com)
- 官方文档:lodash/lodash: A modern JavaScript utility library delivering modularity, performance, & extras. (github.com)
更改文件src/views/TestAxiosView.vue
添加分页器,如下:
<div id="app">
    <input type="button" value="上一页" @click="prePage" />
    <span
      v-for="item in pageItems(totalPageNum, currentPageNum)"
      @click="jumpToPage(item)"
      :style="{ cursor: 'pointer', margin: '10px' }"
    >
      {{ item }}
    </span>
    <input type="button" value="下一页" @click="nextPage" />

</div>更改文件src/views/TestAxiosView.vue
添加script部分,这个我自己写的,里头核心的pageItemsInternal算法是网上抄的
<script>
import { range } from "lodash-es";

export default {
  name: "Book",
  data() {
    return {
      msg: "hello vue!",
      total: null, // 总数据数
      totalPageNum: 1, //总页数
      pageSize: 5, // 每页显示数量
      currentPageNum: 1, // 当前页数,默认当前显示第一页
      firstValue: "", // 分页器用到的参数,表示点击"...."会跳转到哪一页
      secendValue: "", // 分页器用到的参数,表示点击"..."会跳转到哪一页
      //   制造一些假数据,前端来拿测试用
      books: [
        {
          id: 1,
          name: "1984",
          author: "乔治奥威尔",
          pubTime: "2001-01-05",
        },
        {
          id: 2,
          name: "计算机零基础实战",
          author: "张三",
          pubTime: "2022-04-25",
        },
      ],
    };
  },
  methods: {
    setTotalPageNum() {
      this.totalPageNum = Math.ceil(this.total / this.pageSize) || 1;
      console.log("更改this.totalPageNum:" + this.totalPageNum);
    },
    // 通过点击页码进行修改currentPageNum的值
    jumpToPage(i) {
      // currentPageNum变更,请求数据
      if (i == "...") {
        i = this.secendValue;
      }
      if (i == "....") {
        i = this.firstValue;
      }
      this.currentPageNum = i;
      this.getDataByPage(this.currentPageNum);
      console.log(this.currentPageNum);
    },
    getDataByPage(page) {
      console.log("传进来的page是:" + page);
      const _this = this;
      const axios = this.axios;
      axios
        .get(
          "http://localhost:8081/book/findAll/" + page + "/" + _this.pageSize
          // "http://localhost:8081/book/findAll/1/5"
        )
        .then(function (response) {
          _this.books[0].author = _this.books[0].author + page;
          _this.books[0].name = _this.books[0].name + page;
          console.log("_this.books[0].author:" + _this.books[0].author);
        })
        .catch(function (error) {
          console.log(error);
        });
    },
    /**
     * 正常返回:输入一个1到totalPageNum之间的值
     * 规整化: 输入小于1的值,则返回1
     *        输入大于totalPageNum则返回totalPageNum
     * @param {number} value 要规整化的值
     */
    numericalRegularization(value) {
      if (Number.isFinite(value)) {
        if (value < 1) return 1;
        if (value > this.totalPageNum) return this.totalPageNum;
        return value;
      }
      return null;
    },
    pageItems(totalPageNum, currentPageNum) {
      const pageItems = this.pageItemsInternal(totalPageNum, currentPageNum);
      console.log("结果的pageItems是:" + pageItems);
      return pageItems;
    },

    /**
     * 返回分页器中间的页数序列,例如: 1 2 3 ... 20
     *
     * @param {number} lastPage 最大页数
     * @param {number} page 当前页数
     */
    pageItemsInternal(lastPage, page) {
      /**
       * make all page items.
       * use range method from lodash.
       */
      const allPageItems = range(1, lastPage + 1);

      /**
       * range item number.
       */
      const pageItemRange = 2;

      /**
       * page items after current item.
       */
      const pageItemAfter = allPageItems.slice(page, page + pageItemRange);
      console.log("after: ", pageItemAfter);

      const tempAfter = pageItemAfter.at(pageItemAfter.length - 1) + 1;
      this.secendValue = this.numericalRegularization(tempAfter);

      /**
       * page items before current item.
       */
      const pageItemBefore = allPageItems.slice(
        page - 1 - lastPage - pageItemRange,
        page - 1
      );
      console.log("before: ", pageItemBefore);

      const tempBefore = pageItemBefore.at(0) - 1;
      this.firstValue = this.numericalRegularization(tempBefore);

      /**
       * base page items
       */
      let pageItems = [...pageItemBefore, page, ...pageItemAfter];

      console.log("pageItems: ", pageItems);

      /**
       * first and last item
       */
      let firstItem = [1];
      let lastItem = [lastPage];

      if (pageItemRange + 2 < page) {
        firstItem = [...firstItem, "...."];
      }

      if (lastPage - page - 1 > pageItemRange) {
        lastItem = ["...", ...lastItem];
      }

      if (pageItemRange + 1 < page) {
        pageItems = [...firstItem, ...pageItems];
      }

      if (lastPage - page > pageItemRange) {
        pageItems = [...pageItems, ...lastItem];
      }

      return pageItems;
    },
    // 下一页
    nextPage() {
      console.log("未判断前" + this.currentPageNum);
      if (this.currentPageNum === this.totalPageNum) return;
      // currentPageNum变更,请求数据
      ++this.currentPageNum;
      this.getDataByPage(this.currentPageNum);
      console.log(this.currentPageNum);
    },
    // 上一页
    prePage() {
      console.log("未判断前" + this.currentPageNum);
      if (this.currentPageNum === 0) return;
      // currentPageNum变更,请求数据
      --this.currentPageNum;
      this.getDataByPage(this.currentPageNum);
      console.log(this.currentPageNum);
    },
  },
  watch: {
    secendValue(newValue, oldValue) {
      console.log("this.secendValue is: " + newValue);
      //console.log(this.secendValue);
    },
    firstValue(newValue, oldValue) {
      console.log("this.firstValue is: " + newValue);
      //console.log(this.firstValue);
    },
  },
  computed: {},
  mounted() {},
  created() {
    const _this = this;
    const axios = this.axios;
    axios
      .get(
        "http://localhost:8081/book/findAll/" +
          _this.currentPageNum +
          "/" +
          _this.pageSize
      )
      .then(function (response) {
        // 数据总数
        _this.total = response.data.total;
        console.log("response.data.total:" + response.data.total);
        console.log("_this.total:" + _this.total);
        // 设置总页数
        _this.setTotalPageNum();
        // 更改数据
        _this.totalPageNum = Math.ceil(_this.total / _this.pageSize) || 1;
        console.log("_this.books[0].author:" + _this.books[0].author);
      })
      .catch(function (error) {
        console.log(error);
      });
  },
};
</script>

<template>
  <div class="greetings">
    <table>
      <tr>
        <th>aaaa</th>
        <th>aaaa</th>
        <th>aaaa</th>
      </tr>

      <tr v-for="item in books" :key="item.id">
        <td>{{ item.id }}</td>
        <td>{{ item.name }}</td>
        <td>{{ item.author }}</td>
        <td>{{ item.pubTime }}</td>
      </tr>
    </table>

    <input type="button" value="上一页" @click="prePage" />
    <span
      v-for="item in pageItems(totalPageNum, currentPageNum)"
      @click="jumpToPage(item)"
      :style="{ cursor: 'pointer', margin: '10px' }"
    >
      {{ item }}
    </span>
    <input type="button" value="下一页" @click="nextPage" />
  </div>
</template>

<style scoped>
h1 {
  font-weight: 500;
  font-size: 2.6rem;
  top: -10px;
}

h3 {
  font-size: 1.2rem;
}

.greetings h1,
.greetings h3 {
  text-align: center;
}

@media (min-width: 1024px) {
  .greetings h1,
  .greetings h3 {
    text-align: left;
  }
}
</style>
后端需要设置一下
    @ResponseBody
    @GetMapping("/findAll/{page}/{cow}")
    public Map<String, Object> findAll(@PathVariable("page") String page,
                                       @PathVariable("cow") String cow
    ) {
        Map<String, Object> map = new HashMap<>();
        map.put("page", page);
        map.put("cow", cow);
        // 总数,假数据
        map.put("total", 100);

        return map;

    }
刷新网页查看效果

把分页组件抽离出来,加点css
上一节只是实现了一个简单的分页器,这一节我们把它抽离成一个子组件,方便代码复用
顺带加点css,让它好看点
新增文件src\components\PaginationC.vue
内容如下:
父组件引入该分页组件的时候,需要传递的信息的格式
<DividePage :changePage="changePage" :itemLength="trendLength" :pagesizes="pagesizes"/>真实数据-前后端数据交换
在前面的小节中,已经测试了从后端获取数据,并且打印在控制台中。
在这一小节,需要前后端对接,获取后端传输过来的实际的数据并且显示在网页中。
在本节中会涉及到数据库中的实际数据,而不是上一小节中为测试组件而创建的假数据。
小结
做完本节,前端部分vue的学习和练手就结束了,通过这些章节,熟练了vue的基础语法,有了一定的代码编写量。