vue-js-学习-2-模板语法
上一级页面:vue-js-学习索引
本系列关注前端部分,根据学习路线图达到学习Vue.js的目的
developer路线图developer-roadmap/translations/chinese at master · kamranahmedse/developer-roadmap
前言
预先工作
先恢复上一节做的一些破坏性修改,这一节的demo符合vue最佳实践。(使用单文件组件,子组件等)
在src/App.vue中,修改template内容如下:
<template>
  <header>
    <img
      alt="Vue logo"
      class="logo"
      src="./assets/logo.svg"
      width="125"
      height="125"
    />

    <div class="wrapper">
      <HelloWorld msg="You did it!" />
    </div>
  </header>

  <main>
    <!-- 注意这里,恢复正常 -->
    <TheWelcome />
    <!-- <TodoDeleteButton /> -->
  </main>
</template>src/main.js内容如下:
import { createApp } from "vue";
// 从一个单文件组件中导入根组件
// 这个App作为createApp(App)的参数
import App from "./App.vue";

import TodoDeleteButton from "./components/TodoDeleteButton.vue";

import "./assets/main.css";

const app = createApp(App);

app.config.errorHandler = (err) => {
  /* 处理错误 */
  console.log(err);
};

app.component("TodoDeleteButton", TodoDeleteButton);

// 确保在挂载应用实例之前完成所有应用配置!
app.mount("#app");

// 创建多个应用实例
const app1 = createApp({
  /* ... */
});
app1.mount("#container-1");

const app2 = createApp({
  /* ... */
});
app2.mount("#container-2");
模板语法
文本插值
这个上一节已经做过了。
打开src/components/HelloWorld.vue,添加内容如下:
<script setup>
defineProps({
  msg: {
    type: String,
    required: true,
  },
});
</script>

<!-- 注意这里 -->
<script>
export default {
  data() {
    return {
      message: "Hello Vue!",
    };
  },
};
</script>

<template>
  <div class="greetings">
    <!-- <h1 class="green">{{ msg }}</h1>
    <h3>
      You’ve successfully created a project with
      <a href="https://vitejs.dev/" target="_blank" rel="noopener">Vite</a> +
      <a href="https://vuejs.org/" target="_blank" rel="noopener">Vue 3</a>.
    </h3> -->

    <!-- 注意这里 -->
    <h1>{{ message }}</h1>

  </div>
</template>

<style scoped>
h1 {
  font-weight: 500;
  font-size: 2.6rem;
  top: -10px;
}

h3 {
  font-size: 1.2rem;
}

.greetings h1,
.greetings h3 {
  text-align: center;
}

@media (min-width: 1024px) {
  .greetings h1,
  .greetings h3 {
    text-align: left;
  }
}
</style>
原始 HTML
首先来到HelloWorld.vue中。
添加一个rawHtml
<script>
export default {
  data() {
    return {
      message: "Hello Vue!",
      rawHtml: '<span style="color: red">这里会显示红色!</span>',
    };
  },
};
</script>
在template中使用
<template>
  <div class="greetings">
    <!-- <h1 class="green">{{ msg }}</h1>
    <h3>
      You’ve successfully created a project with
      <a href="https://vitejs.dev/" target="_blank" rel="noopener">Vite</a> +
      <a href="https://vuejs.org/" target="_blank" rel="noopener">Vue 3</a>.
    </h3> -->

    <!-- 注意这里 -->
    <h1>{{ message }}</h1>
    <p>Using text interpolation: {{ rawHtml }}</p>
    <p>Using v-html directive: <span v-html="rawHtml"></span></p>
  </div>
</template>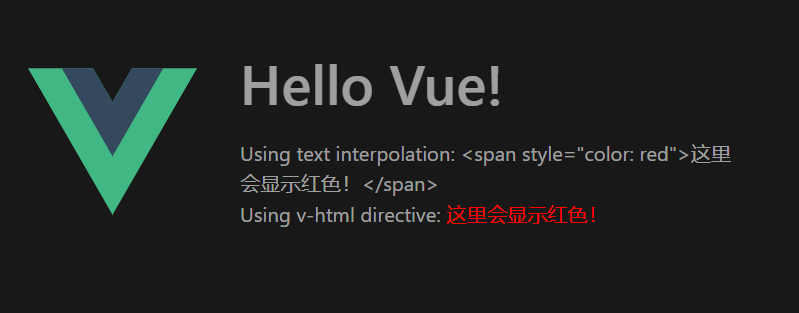
Attribute 绑定
这一节看到后面有用例,常见的用法是两种
<div v-bind:id="dynamicId"></div>或者
<button :disabled="isButtonDisabled">Button</button>用法举例:
<script>
export default {
  data() {
    return {
      message: "Hello Vue!",
      rawHtml: '<span style="color: red">这里会显示红色!</span>',
      dynamicId: "动态id。以后能够用方法来动态改变它",
      isButtonDisabled: true,
      isHasFeatures: false,
    };
  },
};
</script>

<template>
  <div class="greetings">
    <!-- <h1 class="green">{{ msg }}</h1>
    <h3>
      You’ve successfully created a project with
      <a href="https://vitejs.dev/" target="_blank" rel="noopener">Vite</a> +
      <a href="https://vuejs.org/" target="_blank" rel="noopener">Vue 3</a>.
    </h3> -->

    <h1>{{ message }}</h1>
    <p>Using text interpolation: {{ rawHtml }}</p>
    <p>Using v-html directive: <span v-html="rawHtml"></span></p>
    <!-- 注意这里 -->
    <div :id="dynamicId">{{ dynamicId }}</div>
    <button :disabled="isButtonDisabled">Button</button>
    <button :hasFeatures="isHasFeatures">Button</button>
  </div>
</template>
网页效果如下:
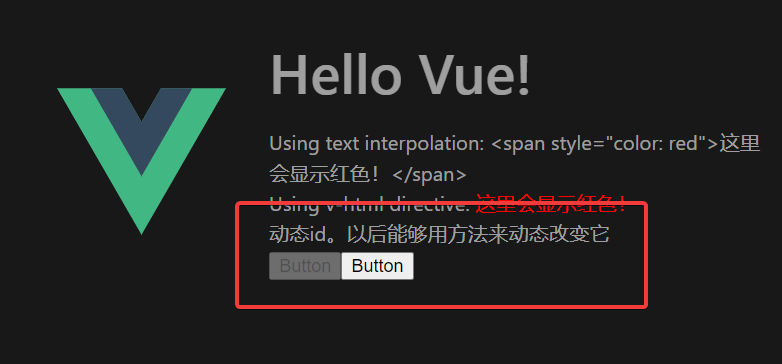
查看控制台,注意区分这里真值和假值的不同表现

动态绑定多个值
如果你有像这样的一个包含多个 attribute 的 JavaScript 对象:
data() {
  return {
    objectOfAttrs: {
      id: 'container',
      class: 'wrapper'
    }
  }
}
通过不带参数的 v-bind,你可以将它们绑定到单个元素上:
<div v-bind="objectOfAttrs"></div>这个关注一下最终生成的效果:

使用 JavaScript 表达式
这个直接复制粘贴,看下效果就行
<template>
  <div class="greetings">
...

    {{ number + 1 }}
    {{ ok ? "YES" : "NO" }}
    {{ message.split("").reverse().join("") }}
    <div :id="`list-${id}`"></div>
  </div>
</template>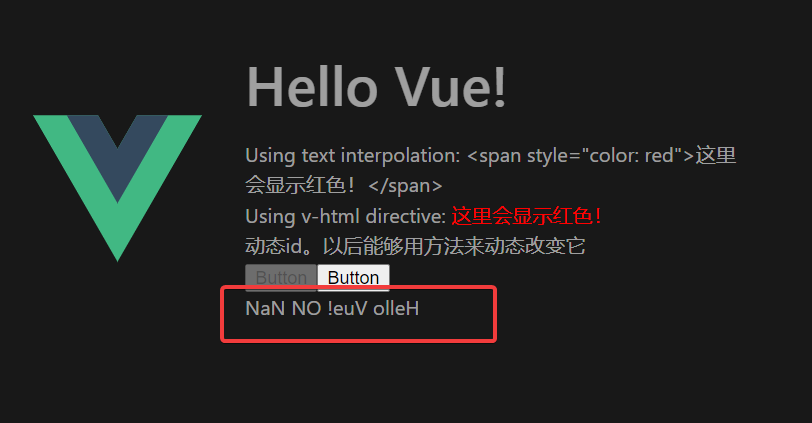
id 改动一下
<div :id="`list-${objectOfAttrs.id}`"></div>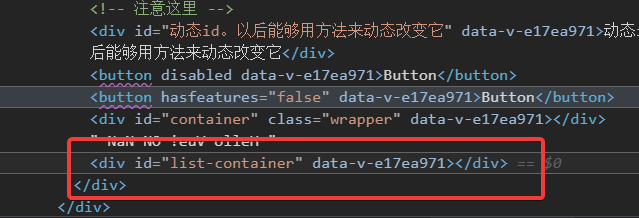
调用函数
<script>
export default {
  data() {
    return {
      message: "Hello Vue!",
      rawHtml: '<span style="color: red">这里会显示红色!</span>',
      dynamicId: "动态id。以后能够用方法来动态改变它",
      isButtonDisabled: true,
      isHasFeatures: false,
      objectOfAttrs: {
        id: "container",
        class: "wrapper",
      },
      date: "2001-05-23",
    };
  },
  methods: {
    toTitleDate(date) {
      return "今天是" + date;
    },
    formatDate(date) {
      return "这里格式化" + date;
    },
  },
};
</script>
调用
<template>
  <div class="greetings">
    <span :title="toTitleDate(date)">
      {{ formatDate(date) }}
    </span>
  </div>
</template>
指令 Directives
这一节很重要,初学者跟着用一遍就行,以后随用随查
当使用 DOM 内嵌模板 (直接写在 HTML 文件里的模板) 时,我们需要避免在名称中使用大写字母,因为浏览器会强制将其转换为小写:
<a :[someAttr]="value"> ... </a>上面的例子将会在 DOM 内嵌模板中被转换为 :[someattr]。如果你的组件拥有 someAttr 属性,而非 someattr属性,这段代码将不会工作。
单文件组件内的模板不受此限制。
- DOM 内嵌模板 (直接写在 HTML 文件里的模板)
- 单文件组件内的模板:就是
*.vue文件内的模板
v-on和v-bind
<script>
export default {
  data() {
    return {
      message: "Hello Vue!",
      rawHtml: '<span style="color: red">这里会显示红色!</span>',
      dynamicId: "动态id。以后能够用方法来动态改变它",
      isButtonDisabled: true,
      isHasFeatures: false,
      objectOfAttrs: {
        id: "container",
        class: "wrapper",
      },
      date: "2001-05-23",
      seen: false,
      url: "http://google.com",
    };
  },
  methods: {
    toTitleDate(date) {
      return "今天是" + date;
    },
    formatDate(date) {
      return "这里格式化" + date;
    },
    doSomething(){
      alert("弹窗!!!")
    }
  },
};
</script>
页面添加以下内容
<p v-if="seen">Now you see me</p>
<p><a :href="url"> click here ... </a></p>
<a @click="doSomething"> do Something ... </a>
动态属性
动态属性是可以变化的,这里给一个示例
<script>
export default {
  data() {
    return {
      url: "http://google.com",
      attributeName: "href",
      githubUrl: "https://github.githubassets.com/favicons/favicon-dark.png",
    };
  },
  methods: {
    onclickToChangAttributeName() {
      if (this.attributeName == "href") {
        this.attributeName = "download";
      } else {
        this.attributeName = "href";
      }
    },
  },
};
</script>
页面部分
<template>
  <div class="greetings">
    <p>
      <a :[attributeName]="githubUrl">
        dynamic attribute now is {{ attributeName }}
      </a>
    </p>
    <button @click="onclickToChangAttributeName">click here</button>
  </div>
</template>
注意这里的变化
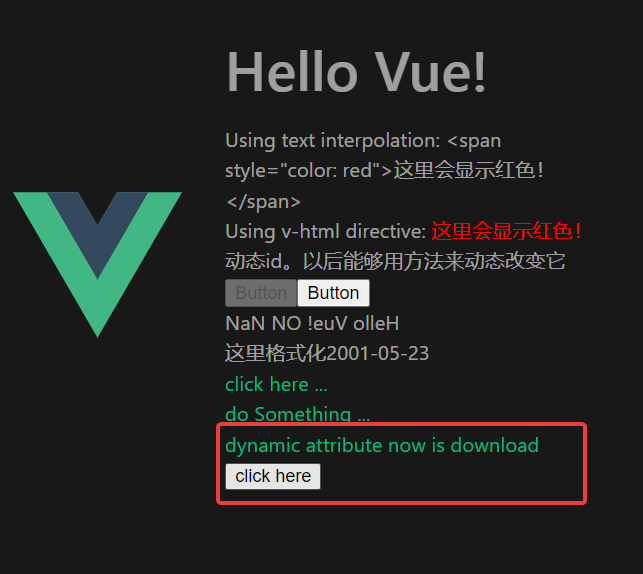
点击按钮后
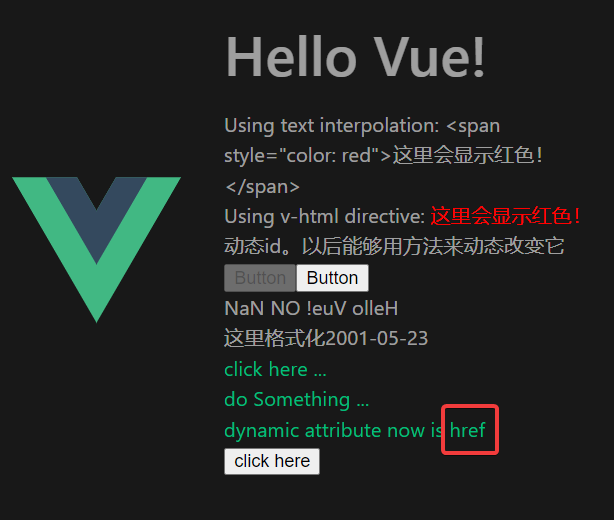
修饰符 Modifiers
这个后面会经常用,详细文档:事件处理 | Vue.js (vuejs.org)